Overview
In this module, I studied visual composition by reading, researching, and using it through photography. Soon I will use this knowledge to make a video montage of my chosen place. Once I had a strong understanding of visual composition, I began the pre-production process for the montage and planned out exactly what it would be about. I wrote a script and made a storyboard in preparation to shoot.
Reading & Writing
This week I read four chapters in Tom Schroeppel’s The Bare Bones Camera Course for Film and Video, covering the basics, composition, camera moves, and montages. I also read about video pre-production planning and storyboarding.
Chapter 1 The Basics – The Bare Bones Camera Course for Film and Video
Cameras attempt to capture what the human eye sees and recreate it. Still, camera capture one image at a time; movie cameras capture eighteen to twenty-four images, or frames, each second. The pictures are projected at the same rate they were captured to create the illusion of movement.
A similar process occurs with digital cameras. Rather than recording the image or series of images on film, they are captured by a sensor which translates it into pixels. For video, this occurs at twenty-five to thirty frames per second.
The exposure determines how much light the camera lets in and is measured in f/stops. In a dark place, the f/stop should be very large such as f/2, and in a well-lit area, it will be lower, like f/22. Each f/stop on a camera lets in half as much light as the f/stop before it. Some newer cameras use t/stops instead of f/stops because it’s more accurate, but both serve the same function.
Another way light is measured is by its color. Warm light is red and cold light is blue. It’s written as 3000K (or any number on the scale). The K comes from how temperature is measured on the Kelvin scale and how black objects like coal change color when they heat up. Most cameras come with color filters that include settings such as Mixed Tungsten and Daylight/Fluorescent, Daylight, and Shade. Each of these refers to a specific level based on the Kelvin scale. White balance is used to ensure that regardless of the temperature, white still appears as white.
Most digital cameras will adjust the exposure automatically, but you can change it manually via the f/stop. Check to ensure that what you’re recording has high levels of detail in both bright and dark areas. On film cameras, the exposure is measured by the ISO or International Standards Organization and indicates the speed or sensitivity of the film. The lower the number, the slower the film, and the higher the number, the faster the film.
Light meters help determine what f/stop to use when shooting on film to ensure enough light reaches the film. If too much light gets in, the film is overexposed, and the product is too light and washed out. If not enough light gets in, the film is underexposed, and the product is too dark. Many kinds of light meters can help determine your camera settings, such as reflective and incident meters.
Different kinds of lenses help us achieve different types of shots. A “normal” lens reproduces what the eye sees. The size of the lens differs depending on the kind of camera but generally shows a horizontal area of roughly 25 degrees. A lens that shows an area wider is called a wide angle, and a lens that shows an area less than that is called a telephoto. Wide-angle lenses often produce distortion.
Most cameras focus automatically, but it is best to do it yourself when possible. You can turn the focus ring on cameras with through-the-lens viewing until you have the desired result. On cameras without through-the-lens, you have to estimate the subject’s distance from the camera and then put the focus ring on that setting.
Zoom lenses combine wide-angle and telephoto lenses into one. To focus a zoom lens, zoom all the way into an object and then focus the lens. Now you can zoom out and have a perfectly crisp image.
The depth of field is the area in front of the camera where everything is sharp and focused. An example might be between 10 and 12 feet from the camera. The depth of field decreases as focal length increases, so the more you zoom in on something, the less area around it will be in focus. Conversely, depth of field increases as focal length decreases, so a wide-angle lens can record a larger area in focus. The depth of field also increases as the aperture gets smaller, so at f/22, there is more depth of field than at f/1. Additionally, the depth of field increases when the subject is farther from the camera.
Chapter 2 Composition – The Bare Bones Camera Course for Film and Video
The camera communicates the story to the viewer, so it is vital to consider how you use it carefully.
Tripods stabilize the shot and let the audience feel more immersed in the content. You should use a tripod whenever possible. When you can’t, try to find at least two points of contact for a stable shot.
The rule of thirds helps us set up visually appealing shots. To do so, divide elements of the frame, so they align in thirds vertically and horizontally in the frame. Put the subject or other prominent points in areas where the thirds intersect.
It is also vital to leave head room or lead room for subjects. Lead room is the space in front of a person or object when they are looking to the side in a frame. Lead room gives them somewhere to go, provides balance, and keeps the viewer from feeling that the subject is boxed in.
Objects should also be balanced in the frame. If there is only one large subject off to the side, the shot feels unbalanced, but another object is on the other side will feel more balanced. Pairing a large object with a smaller object can make the shot more dynamic and visually appealing, while pairing two similar objects makes it feel static.
Balancing colors helps ensure the audience focuses on what you want them to. The eye is naturally drawn to white or bright colors. Brightness adds more weight to a composition than darkness.
Photos and videos are flat, so we use angles to provide a sense of depth. Showing at least two sides of something is the most effective way to demonstrate the depth of an object. Get depth by placing the camera at a different height than the subject. When the camera is higher than the subject, it becomes smaller and seems inferior. When the camera is below the subject, it looks larger and more significant.
One way to make a frame more interesting is to use objects at the location to create a frame around the subject. This strategy can also be used to hide unwanted elements in a shot. Leading lines are another way to make shots more interesting by drawing the audience’s eyes through the frame. Be aware of objects in the background because they can detract from the shot. For example, flagpoles can appear to grow out of the top of someone’s head, or a person can blend into a busy background.
Chapter 5 Camera Moves- The Bare Bones Camera Course for Film and Video
The three basic camera moves are zoom, pan, and tilt. Zooming in draws the audience’s attention to what you zoom in on. Zooming out generally reveals new information or provides context. Pans are horizontal moves, and tilts are vertical moves. Both reveal new information.
A good camera movement begins and ends with a well-composed static shot. Cutting to or from a shot that is already moving can be disorienting and confusing. When shooting, start in an uncomfortable position and end in a comfortable position. This will allow for the smoothest camera move possible.
Every camera move should have a specific purpose. Too many moving shots limit the editing process and can make aligning narration difficult. Consider shooting several different shots, including static, of the same scene, so you have as much content to work with as possible when editing.
Chapter 6 Montages – The Bare Bones Camera Course for Film and Video
A montage is a series of shots that condense time or distance, set a mood, or summarize information. A common use is a training montage. Montages are most effective when each shot is clearly different from the one before. One way to do this is by tilting each shot in an other direction.
Video Pre-Production Planning Check-List – 12 Steps to a Successful Project
This article by Jimm Fox lays out 11 steps to take in the pre-production process for an excellent final product.
- Clearly define your business objective.
- Without a purpose, your video likely won’t accomplish anything, so you must ask yourself what you want to happen when the audience finishes watching your video.
- Define the audience
- Having a well-defined target audience helps determine how you will communicate the message. Specific demographics and psychographics respond to different content differently, so targeting one group will help you choose the best way to deliver your message.
- Set a budget
- A budget will determine what is – and isn’t – possible for the production. Having a well-defined budget from the start narrows the possibilities for the final product. This step can help save time and frustration among a team.
- Define essential messages
- Promotional content can’t be successful without well-developed ideas, themes, and topics. Similar to step one, if you don’t have something specific you want to accomplish, the final product will not have an impact.
- Develop a creative brief
- When hiring a production house or working on a team, creative briefs are used. The brief clearly defines the purpose and goals of the project and keeps everyone focused on achieving the overarching goal. The brief also contains all other relevant information that someone entering the project with no prior knowledge might need.
- Concept Development
- This step begins taking the objective and message and turning them into something creative and exciting for the audience. Concept development often comes from brainstorming sessions and focuses on how to reach the target audience.
- Treatment and storyboard
- Treatment is a one-page document that outlines the creative approach and summarizes the general idea, the style, and the actions that compose the final product. Treatments are used to present ideas before executing them, eliminating the risk of wasting time and money.
- A storyboard is an initial visual plan of the final product. It goes into more detail than the treatment, describing specifics of what will be shown, what music or audio will be used, and even transitions between scenes.
- Plan distribution
- The final product won’t be beneficial if it doesn’t reach the audience, so having a distribution plan is vital. It can even impact essential factors like the asset ratio the video is shot in; a video for TV will be vastly different than a video for TikTok.
- Video length
- Video length will be determined in the storyboard phase, but it’s essential to keep it in mind throughout the process. Shorter videos are often ideal because they’re more likely to hold the audience’s attention, but it also requires you to distill the message.
- Approvals
- Approvals often start at the storyboard and help make sure the project stays on track with the vision, goals, and desires of those higher up in the organization. Approval is often more important in larger organizations because fewer people will be directly involved and therefore are more likely to be shocked when they see the final product.
- Pre-production meetings
- Pre-production meetings provide a dedicated collaborative space for exploring ideas before anything is finalized. In this step, brainstorming occurs, and different storytelling methods are explored and discovered.
- Scheduling and production planning
- Scheduling and production planning happen in the pre-production process and limits the number of things that go wrong during the filming process. The schedule and production plan most frequently determine the location, if permits are necessary, finding a crew, getting equipment, finding talent, checking the weather if applicable, and creating a schedule and shot list.
Research to Inform
This week, I researched the different kinds of shot compositions and found examples of them in movies and television.
Balance
In the opening scene, The Sound of Music uses balance to make it flow. As Julie Andrews wanders around the lush fields, the camera gives her plenty of nose room. This makes the scene feel more natural because the viewer can see the space she is walking into. It also has the added benefit of helping establish the location.
Framing
This is my favorite scene from my favorite movie: Journey to the Center of the Earth (1959). In it, the characters discover a dazzling underground cave full of crystals and flowing water. In this scene, there are two instances of framing. The first occurs when we see the characters looking down – the rock on three sides creates a natural frame. Then, when the camera cuts to the crystal cave, that too is framed by rock but much more of it is obstructed than when the rocks are framing the characters. Framing is used effectively here because the slight obstruction of the crystal cave makes the audience more excited to see the whole thing.
Angels
This scene from Inception uses angles to create an impossible world that could otherwise only exist in dreams – or movies. In it, the main character learns to manipulate landscapes in people’s minds and uses her abilities to turn part of the city upside down. Unusual and unnatural angles (and some special effects) communicate this with the audience.
Another scene that uses angles is this one from Dead Poets Society. The angles here are used more emotionally than in Inception. The camera looks down at Robin Williams, reflecting that he is defeated because he has just been fired. When the camera cuts to the boys standing on their desks, it represents Robin Williams’s character’s impact and the power they hold when they do something together.
Depth Of Field
This emotional scene from Handmaid’s Tale uses depth of field to build suspense and help tell the story. They use depth of field to focus on one subject at a time and prevent the audience from getting distracted to trying to rush through the scene. While the depth of field is seen in the whole clip, it begins having more impact toward the end when the scene builds to the climax, stopping on each character until, finally, the main character holds out her stone. The camera focuses on it as she drops it, emphasizing the weight of the decision.
Create
To prepare for the video montage, I practiced setting up shots by taking still photos that demonstrate good camera work. The shot list that I completed included the following:
- Rule of thirds
- Balance
- Angles
- Natural frames
- Leading lines
- Backgrounds
- Basic shots
- Perspective
- Shallow depth of field
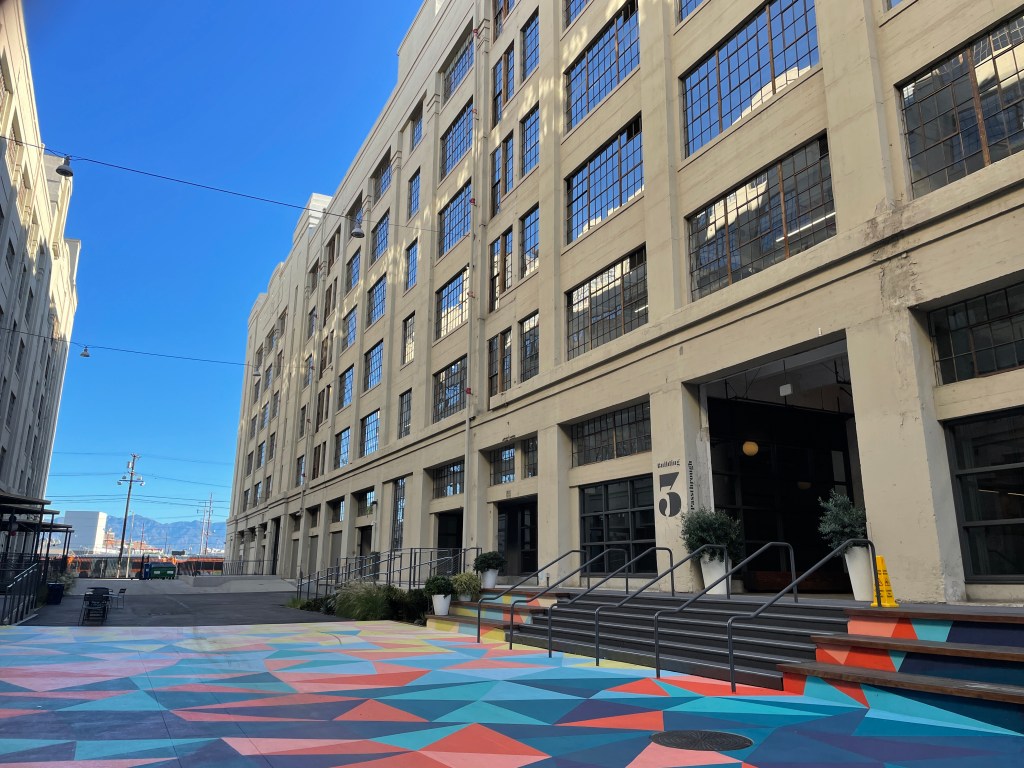
I was excited to do this project because the area where I work has a lot of fun architecture and interior decoration. As such, I had many exciting opportunities to complete each shot. The primary problem I faced was shooting on an iPhone rather than a DSLR. I defaulted to shooting in portrait and had to retake many of the shots I initially got. I also struggled to show the depth of field because I had no control over the focal length. I used portrait mode to recreate the effect, but it looks highly synthetic.
My favorite shots were the rule of thirds, leading lines, and frames. I often think about the rule of thirds when taking photos for personal enjoyment, so this was familiar and relatively easy. I also think the rule of thirds is generally easier to execute because there are so many elements in any shot that can be aligned with the thirds. Using frames was my next favorite because it was somewhat easy to find something to frame the shot with, making the final image much more enjoyable. Leading lines was my third favorite because it was more difficult to find lines, but I think it made for some of the most exciting compositions.
Once I completed the shot list, I began the pre-production process of planning out the montage. I laid out the basics, such as the length of the concept of the video. I decided to make the montage about the area where my internship is. It’s called The ROW and used to be an industrial complex. It’s been converted into fancy shops at the group level with office spaces above them and has been redecorated very colorfully.
I chose this location because I’m very familiar with it and want to share how aesthetically pleasing it is. While I think it will be fun to film, I know I may face some challenges. I think the hardest part will be achieving the shots I want on my phone. I will have much less control over the depth of field than on a DSLR and more significant limitations on how much I can zoom and maintain the quality. Despite this, I will do my best to make it the best I can!
